Minecraft
You can disable mob spawning on your Minecraft server in several different ways, depending on whether you wish to stop all mobs, just hostile ones, or a single specific type.
Disabling All Minecraft Mob Spawning
- Navigate to the Wabbanode Control Panel, select your server, and stop it before making any changes.

- Open the Settings tab and click Open File on
server.propertiesto edit it directly.
- Set
spawn-monsters,spawn-animals, andspawn-npcs(villagers) tofalse.
- Save the file, then restart your server using the Restart button at the top of the panel.
This stops new mobs from spawning naturally but doesn't remove mobs already in the world. Use /kill @e[type=!minecraft:player] in the console to clear existing ones. It also won't stop mobs from monster spawners, such as those in dungeons, since spawners work outside the normal spawning rules.
![Minecraft server console showing the /kill @e[type=!minecraft:player] command and the killed entities response](https://image.wabbanode.com/file/Wabbanode/knowledgebase/minecraft-server-console-showing-the-kill-e-type-minecraft-player-command-and-th.webp)
Stopping Minecraft Mob Spawning Temporarily
For a quicker, temporary stop without editing the file or restarting, run this in the Console tab instead:
/gamerule doMobSpawning false
This takes effect immediately but only lasts until the world reloads.

Disabling a Specific Minecraft Mob Type
To stop just one mob type, such as phantoms or creepers, without touching everything else, vanilla doesn't offer per-mob toggles, so a plugin or mod is the most reliable route.
Using a Minecraft Plugin (Paper / Spigot Servers)
On Paper or Spigot servers, a plugin like EssentialsX or a spawn-control plugin lets you set spawn weight or disable a mob type entirely in a config file.
- Navigate to the Wabbanode Control Panel, select your server, and stop it before making any changes.
- In the sidebar, open Add Content, switch to the Plugins tab, search for a spawn-control plugin such as EssentialsX, and click Install.
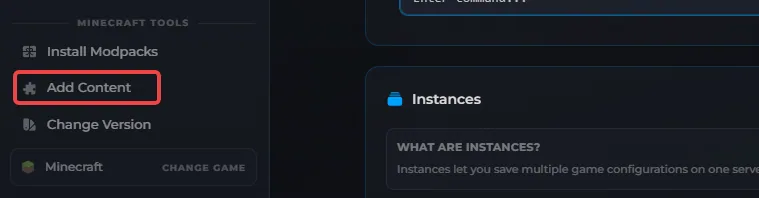
- Once you have restarted the server to load the plugin, open the Files tab and edit the plugin's config file found in the plugin folder to disable spawning.

Each plugin has its own configuration settings, check its wiki page for exact setup instructions.
Using a Minecraft Mod (Forge, Fabric, Quilt, or NeoForge Servers)
On a modded Forge, Fabric, Quilt, or NeoForge server, You Shall Not Spawn! does the same job through a config file rather than a plugin.
- Navigate to the Wabbanode Control Panel, select your server, and stop it before making any changes.
- In the sidebar, open Add Content, switch to the Mods tab, search for
You Shall Not Spawn!, and click Install. You will need to restart the server for the mod to be installed. - Open the Files tab, navigate to
config/ysns/, and add the mob's ID todisabled_entities.json5to block it completely, or set a spawn chance for it inper_dimension_entities.json5instead of blocking it outright. - Restart your server for the change to take effect.
If you're running a modpack and a mob still won't stop spawning after this, check the modpack's own mod configs first, since some modpacks already bundle a spawn-control mod with its own rules preset, and those can override or conflict with changes you make afterwards.
Reducing Minecraft Mob Density Without Disabling Them
If your goal is less lag rather than no mobs at all, the options differ depending on your server software. On any server, lowering simulation-distance and view-distance in server.properties shrinks the area the server actively processes, which cuts down on spawn attempts as a side effect. entity-broadcast-range-percentage is a separate setting that reduces lag by limiting how far away entities get sent to a player's client, it doesn't change how many mobs actually spawn or exist on the server.
On Paper or Spigot servers, spigot.yml has a dedicated mob-spawn-range setting for the chunk radius mobs can spawn in around a player, plus separate spawn limits per category (monsters, animals, water animals, and ambient mobs) for finer control.
- Navigate to the Wabbanode Control Panel, select your server, and stop it before making any changes.
- Open the Settings tab and lower Simulation Distance and View Distance, or open the Files tab and edit
mob-spawn-rangeand the spawn limits inspigot.ymlif your server runs Paper or Spigot.
- Save your changes and restart your server.
Mob spawning on your server is now set up the way you wish, whether that's off completely or just toned down.